Pages

Monday 29 October 2012

Module 2 Chapter 6 (page 21)

Texture Resources
 
 
Soft and Fluffy (above)


Smooth and Shiny (above & aubergine below)


Soft and Smooth (above)


Coarse and Rough (above)


Sharp and Spiky (above)
 
 
Word Bank to describe texture...
 
 silky, smooth, fluffy, spiky, rough, rumpled, feathery, coarse, crunchy, creased, knobbled, bushy, cratered, dusty, dry, grooved, fuzzy, bouncy, glassy, puffy, moist, woolly...

I'm sure I'll think of more to add as time goes by!
 
Bridget Riley and Visual Texture
 
Examples of Bridget Riley's work that are 2D but create a feeling of being 3D. The movement of the lines creates this optical illusion. I appreciated the technique use in these paintings, but couldn't say that I really liked them.


Using cable stitch to recreate Bridget Riley's 1963 painting 'Fall'


This was quite difficult to recreate and I wasn't really happy with the final result. If sewing this gain, I would 'bunch' the lines up in the curves more, with the thread closer together. This would help in creating the optical illusion required. Also, I would try a thicker thread. I'm afraid that I didn't really like the art work enough to have another try!
 
Experiments with Stitching Textures


Leaves in Autumn (front)


It was quite easy to choose colours for the leaves, but quite difficult to create the crunchy, rough textures. I tried using different width threads (weights 30 & 40), but wasn't overly impressed with the final result.

Autumn leaves (back)


When I turned over the leaf picture to trim the threads, I found that I preferred the effect that the back of the sewing made! I had used a different colour thread under parts of the design and this created a 'negative' image, with black thread where the outline and veins of the leaves had been on the front of the sample.

A cactus


The texture of the cactus was easier for me to sew, as the very fine spines could be created by using a fine thread, and the fleshy green parts by using granite stitch in a thicker (weight 30) green thread.


Alium Flower Heads


I tried to create the fluffy heads of the flowers by using moss stitch in a 40 wt purple thread and the stamens of the flower heads with a 30 wt variegated green thread. I thought the moss stitch was quite effective in creating the texture of the small flowers, but looking back the the design now, wish that I had sewn more of them, to fill out the final design a little more.

Spiky Leaves on a Thistle


For this sample, I decided to use a thinner (30wt) thread and only sew the outline, in the style of Cefyn Burgess. I used a lilac thread initially to outine the shape of the leaves and then followed this with a fine silver thread. I was pleased with the final result, but thought that maybe I had relied on the colours I had used, rather than thinking about the texture.


Mark Making to create Visual Texture


The following exercises were completed using charcoal, fine black pen and black ink (applied with a sponge).


Struggling through a thorn bush, recreated with weight 8 black thread, using cable stitch. Although I haven't managed to stick to the design of the original, I liked the effect of 'struggling' that the more knotty areas made.


Crunching through frost recreated with weight 12 black thread, using cable stitch & also weight 40 thread free embroidery from the top. I thought this wasn't so successful as it looked too clumpy. Perhaps I should have used finer thread throughout and sewn less densely?


Wrapping yourself in a coccon of vine leaves, recreated with weight 40 thread, using free machine embbroidery from the top. This was quite successful, as a fine line is easy to imitate using thread.


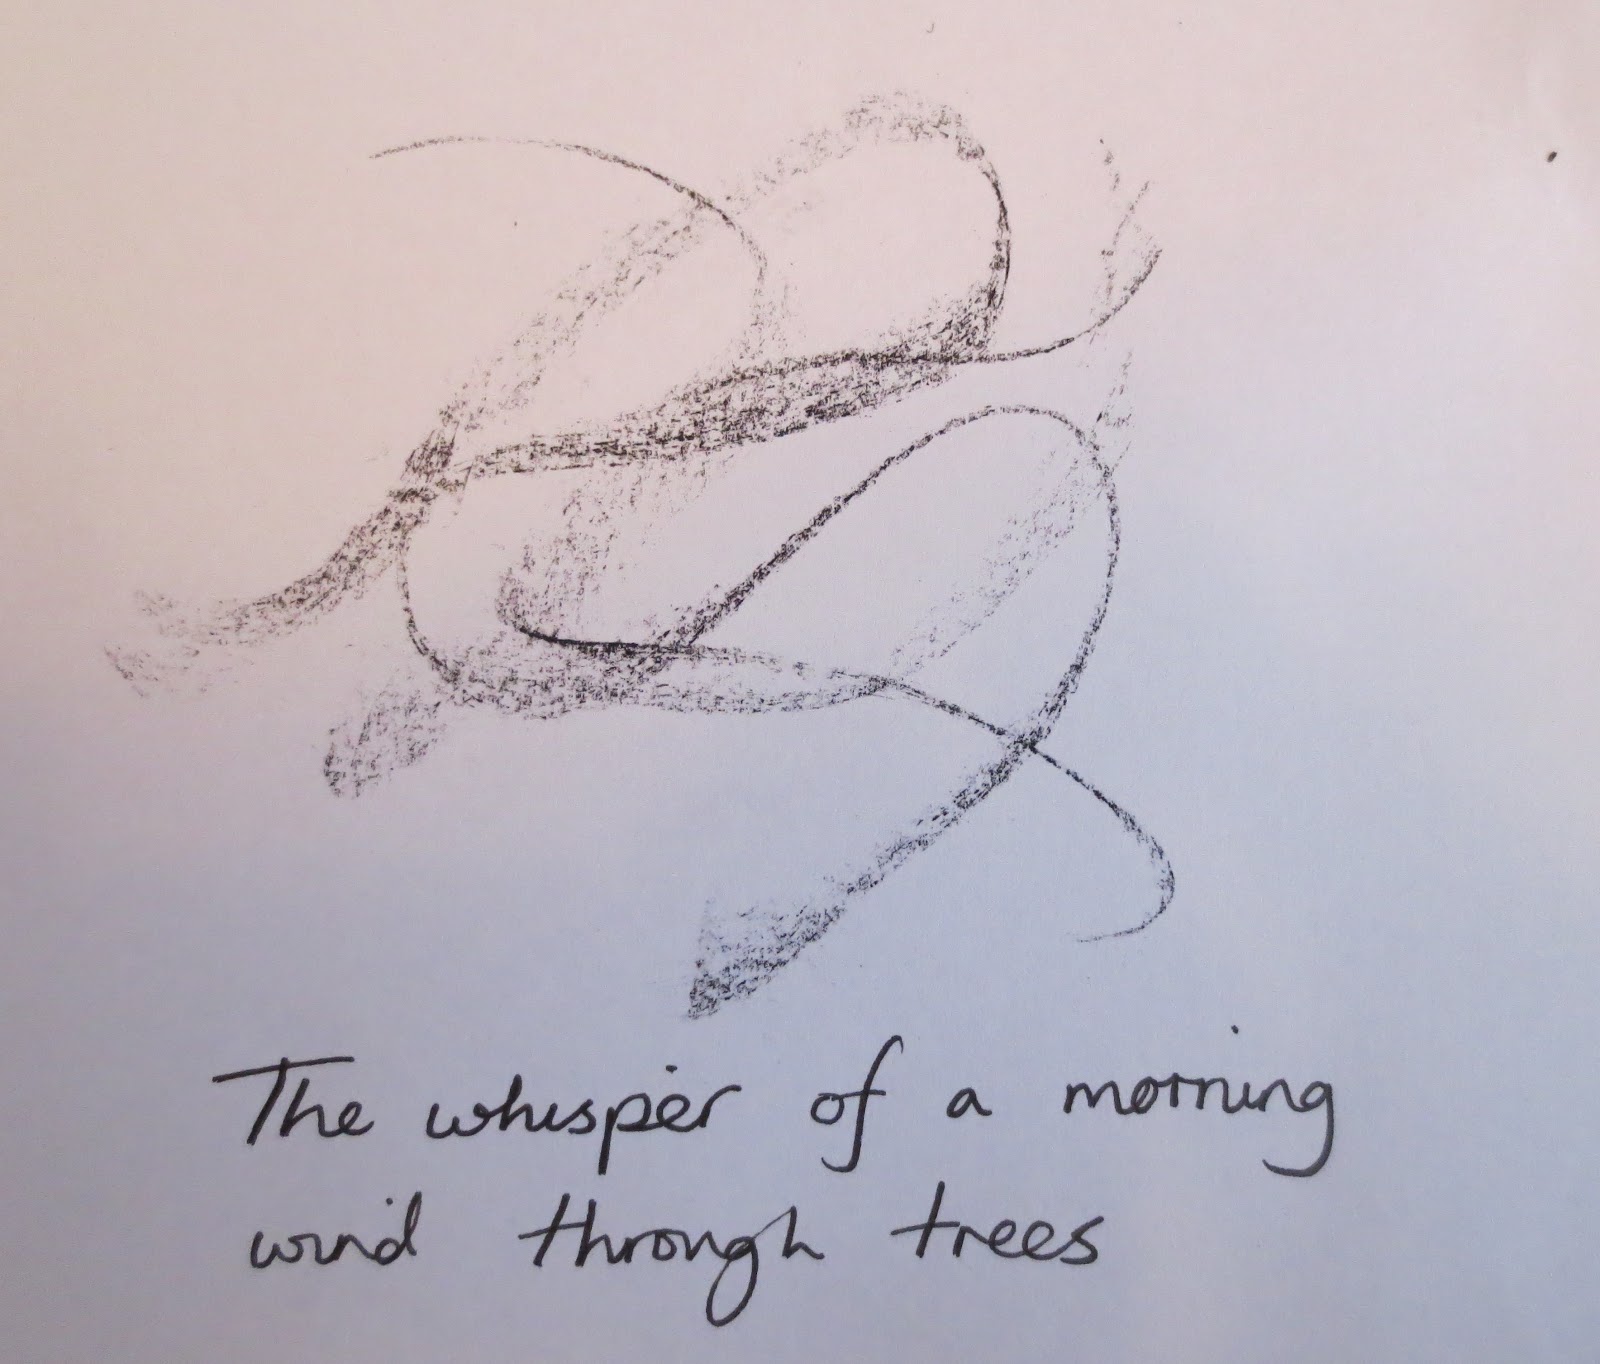
I found that the designs with definite 'lines' were easier to recreate, and that I would need to think more carefully about how to achive thicker lines or 'patches' of stitching. I wasn't able to think of a way to recreate the wispy lines of the 'whisper of wind', despite looking at my thread collection for quite a while for inspiration!
 
Creating Texture with Paper and Glue


Inspiration


I liked this image, as it has quite alot of depth, an interesting texture and different colours that I would be able to pick out with thread.


Thread selection...


I chose a range of threads to use; from thick hand embroidery threads, wt 8 embroidery threads (in olive green) and wt 40 machine embroidery threads.


Tree bark picture, recreated in tissue paper and PVA glue


Mapping out the design on felt


The final design
 
The two layers of felt were stitched together (by hand) and then the top layer of felt was burnt away. I found that this took quite a long time, as the stitching was quite thick. I found that high and low relief areas were re-created effectively and did resemble the initial picture, although I would have liked some of the edges where the two layers were joined together to be a little 'rougher'. Perhaps I would have been able to achieve this by using slightly less stitching near the edges of the shapes for the top layer, or by using thinner thread in these areas?
 

Wednesday 15 August 2012

Module 2 Chapter 5 (page 20)


Chapter 5 - page 20


Design and make a textured tassel

Inspiration

I looked back through the pictures I collected in Chapter 1 for Module 2 and came across this photo of bluebells...


I started to draw different designs for the tassel and experiment with petal shapes that I thought might work effectively.


I made a mock up of the tassel from paper, deciding that a petal shape with a narrow top would work well, in order to reduce the amount of bulk at the top of the flower where the petals would meet.


Paper mock up of tassel


Stitching

I tried out different automatic stitches and threads, trying to find a combination that would provide good coverage over the black felt background.


I decided to use the flower shaped stitch on the right (Stitch No. 155), as it provided good coverage over the black felt background, an interesting texture and also showed off the effect of the variegated thread well.
I stitched the outline of each petal in the lighter thread (Anchor Pearl Cotton wt 8, colour 1325) through the bobbin, followed by the darker purple variegated thread (Wonderfil Accent wt 12, colour 10). I used a plain purple thread through the top needle throughout, which shows on the reverse side of each petal.

 
Petal front


Petal reverse


My first ideas for the tassel skirt was to use machine wrapped wool in yellows and golds, and to sew a pom pom at the end of each one. However, when I tried this out (below) and placed it next to the petals of the tassel, the effect was quite dull and unexciting.


I decided to go back to the original ideas of sari silk, as it is quite shiny, and folded it in half before stitching in gold machine embroidery thread, using the same automatic stitch I used for the petals. I found some multi-coloured sari silk in my stash that picked up the colours of the petals (purple) and also included some golds and yellows.


Finished Tassel

This is a photo of the first version of my tassel. Although I liked it, I felt the skirt looked as though it was unfinished and needed a little extra 'something' to complete it.


I decided to add some beads to the ends of the stitched sari silk, choosing some golden brown glass beads. The final version is pictured below. I was much happier with the finished product and felt that there was a good balance of colours between the fabric, stitching and beads, and I also like the way the light catches the glass beads and draws the eye to the colours in the skirt.


Close ups of the finished tassel...

Tassel top


Tassel skirt with beads


Close up of stitching


Total time spent = 21 hours

Final Evaluation

Overall, I was pleased with the final result, and liked the combination of shapes, textures and colours that I used. I learnt quite a lot in the process of making the tassel too...

I needed to adapt the shape of the petal to reduce the amount of bulk at the top of the flower, which is where the paper mock up was useful.

I had to change my original idea for the tassel skirt as the colours were too dull - the sari silk was much more dynamic and exciting to use than the the wrapped wool idea.

Sometimes it is worth waiting to add a finishing touch to a project (the beads), rather than accepting a finished product as it stands.


Sunday 20 May 2012

Module 2 Chapter 4 (page 19)

Cable Stitch

Cable stitch with the presser foot on

Sample 1 (below)

I used a variety of different threads for this sample:
a light blue Anchor hand embroidery thread
a thin, variegated purple wool
a thicker, textured purple wool
a mid-blue blue hand-dyed linen thread
a bright green Wonderfil thread (Razzle No.250, wt 8)


I sewed the lines of stitches very close together and enjoyed creating different textures this way - some threads were much more raised from the surface than others, and the textured threads created little 'nobbles' which I thought looked interesting.
I used a purple thread in the top needle throughout, and it was pulled through to the surface of the stitching. The wool was more difficult to sew with than the embroidery threads and there were places where the thread in the top needle got caught up and created loops on the surface.

Zigzag stitch

Sample 2 (below)

I tried sewing in cable stitch using different widths and lengths of stitch, with different types of thread. The following picures show:
metallic thread ( Wonderfil Dazzle No. 941, wt 8)
Madeira Glamour thread Col. 2070
Madeira variegated Decor thread (Col. 1591, wt 6)
thin purple silk ribbon (interesting knobbly effect, but the thread from the top needle kept becoming knotted).


and in the picture below...
light blue hand embroidery thread
purple wool (I liked the softer 'wiggly' effect of the wool, but it was too stretchy and kept skipping stitches or breaking).


Cable stitch and automatic patterns

Sample 3 (below)


I tried out a few different stitches and threads, with varying degrees of success! I found that the more 'open' kinds of pattern worked better on my machine, with threads that were not too bulky. Perle and hand embroidery thread were ok to use, as long as the machine didn't have to go back on itself because the thread then knotted and got caught on the bobbin.
Stitch Numbers used (top to bottom)
119
146
155
153
126
117
119
120
126
156
160
169

I liked the effect created by No. 119 and 117, which covered the background fabric well, but also liked No. 120 (with the open circles) for a more delicate effect.

Cable stitch and free embroidery

Sample 4 (below)


I used a metallic green thread here (wt 8) on black felt. The thread became a little knotted and caught up, but was easier to handle once I tightened the top tension a little.

Sample 5 (below)


For this sample, I used a viscose wt 6 thread (Madeira). I liked the effect created by using a variegated thread, but found this quite difficult to handle (lots of time spent untangling thread in the bobbin!)

Sample 6 (below)


I used a bright green wt 8 thread here, and still found this a little tricky to handle, as can be seen from the small knots and tangles on the surface.

Sample 7 (below)


For this sample, I tore strips of pink, blue and green silk and layed them on a backgound of white felt. I backed this with medium weight Vilene before sewing. This time I tried lots of different threads over the background in lines. This was much easier to sew than the previous three samples (perhaps because the layers were thicker?), and I was pleased with the final results. Threads that I used were cotton perle wt 8, a thick cotton knitting yarn and hand embroidery threads.
Comparing different types of threads

I drew a 4 x 4 grid, which I then divided into 16 squares and drew a different pattern in each one. Using a pink thread in the top needle, I then stitched the design in cable stitch from the back of the material.
For this first attempt (sample 8), I used a bright green Wonderfil thread in the bobbin (Razzle No. 250, wt 8). I loosened the bottom tension as much as possible and kept the top tension at around 3. When I turned the fabric over, the designs had come out quite clearly, but there were little knots and jumps in stitching. I tried tightening the top tension a little more (to 4 or 5), and this seemed to help reduce the problem. I also found that I had to keep moving, as knots would easily form if stitching too long in the same position.

Sample 8


For the next sample (No. 9), I decided to use a metallic thread in the bobbin (Madeira Glamour No. 2070). The thread seems to create a more dense effect here, and I think that the stitching is a little neater than my first attempt. I liked the metallic thread here and it was also easier to sew with than I thought it would be.
Sample 9

For my third attempt (sample 10) at sewing the grid, I used a pink perle Anchor hand embroidery thread in the bobbin (wt 8). I kept the top tension to around 4, and the stitching seems reasonably neat - there are only little knots and loops where the patterns are more complicated, such as the spirals.

Sample 10


Cable stitching a design

I found an image of waterlily seed pods that I thought would make a good design for this sample.


I chose some felt that had a mixture of colours as a background material (pink, green, purple) and used a stabiliser behind it. The outline of the design was marked out on 'stitch and tear' and stitched the outline of the seedpods from the back, using cable stitch in the bright green thread in the picture below (sample 11).
I also stitched around the openings for the seeds inside the outline in the same bright green, to link the colours together. The inside of the openings was sewn using cable stitch again in a dark maroon hand embroidery thread, in spirals, which raised the surface of the dseign a little. I kept a bright green thread in the top needle, and this has been pulled through to the surface, creating little speckles of green.
I stitched the inside of the pods in a variegated viscose Madeira thread (Decor Col 1591, wt 6), in lines and circles, which I like the effect of, but my machine found quite difficult to sew. Again, I kept the bright green in the top needle, as I liked the contrast between this and the pink of the main thread used.
Overall, I really liked the final design, and learnt alot about how to stitch with thicker threads, especially how to change the settings on my machine.
(Time spent = 7 hours 40 minutes)

Sample 11


Cable stitching the background of a design

I used the same waterlily design as for the previous sample, but this time changed the colour scheme and also took away one of the seed pods, in order to expose more background area (sample 12).
This time, I used a wider variety of threads, with varying degrees of success!

I stitched the outline of the pods using a light green hand embroidery thread, and a dark purple in the top needle. I had some problems with the thicker thread knotting and breaking, and couldn't seem to get the tensions quite right. I sewed the inside of the seedpod 'holes' in a dark purple hand embroidery thread, using spirals again, which my machine seemed to enjoy a little more, and this provided some tonal contrast to the other colours I used. I then stitched the background of the design in lines, using a metallic teal, purple wool, a light blue embroidery thread and a thinner, purple Wonderfil thread. The machine hated the wool, which kept stretching and breaking, but seemed to cope with the other threads reasonably well. I kept the dark purple thread in the top needle throughout.

I liked the colour comination of this design, and found it interesting to only stitch the background, but think for this to be more effective, I needed a design with more background showing. I was also itching to stitch inside  the seedpod on the left, as this seemed to be quite a large space to leave alone, but wasn't sure if this would be 'overstitching'.
(Total time = 4 1/2 hours)

Sample 12


Using the stitches from Chapter Three and Chapter Four

For the next two designs,  I went back to my source material for chapter one, and chose the flower image I had already used for some of the printing designs in chapter two.


I thought that using the same image, but in different sizes would create some depth to the design, and I also slightly overlapped two of the flowers to link the images together. I chose a blue and purple hand dyed piece of felt as my background and used a stabiliser behind this. For a colour scheme, I decided to pick up some of the purples from the felt, as well as adding touches of brighter colours.


Sample 13


The stiches and threads I used were as follows:
Granite stitch inside the flower petals in a variegated purple thread (Wonderfil Accent No. 10, wt 12)
Granite stitch inside the middle of the flowers in a variegated light green, blue and turquoise perle Anchor hand embroidery thread
Whip stitch for the outline of the flowers
Cable stitch to create lines around the shapes of the flowers (Wonderfil Dazzle No. 941 wt 8)
and the Madeira Glamour thread, used in earlier samples.
Vermicelli stitch to fill in background space in a variegated blue, green & yellow thread (Wonderfil Fruitti No. 02, wt 50)
Moss stitch in a variegated pink, purple, lemon and brown thread to fill in background space (Wonderfil Mirage No. 12, wt 30)
Whip stitch in the variegated light green, blue and turquoise hand embroidery thread used earlier, to outline the flowers. A dark blue was used in the bobbin, and can be seen if looking closely.


Close up of the stitching


(Total time spent = 9 hours)

Using stitches, a second piece

For the second piece (sample 14), I used the same flower outline as the previous sample, but this time on a background of transfer painted satin. I sponged the transfer paint onto paper before ironing onto the satin, to create a mottled effect, leaving the flower shapes blocked out by cutting out their shapes in paper and  fixing these to the surface. As I thought this looked quite harsh, I lightly ironed over the white patches to transfer a lighter coating of colour onto the satin.


Sample 14


I used a variety of threads and stitching to complete the design:
Cable stitch in a bright green thread to create lines around the flower shapes (Wonderfil Razzle No 250, wt 8).
Cable stitch in  light purple hand embroidery thread around the adge of some of the flower shapes
Moss stitch in  a variegated lilac, pink and light green thread inside the petals of the flowers (Wonderfil Accent No. 20, wt 12)
Granite stitch to fill in the centre of the flowers in a metallic purple thread (Madeira Col 213)
Granite stitch to fill in areas of the background in a lilac thread. I didn't cover the whole of these areas, I tried to echo the background colours by stitching over any lilac parts.
Vermicelli stitch in  an Anchor variegated blue, green and turquoise perle thread (wt 8) to fill in background areas. 
Feather stitch in the metallic purple that I used for the granite stitch, with a bright green in the bobbin


Close up of the stitching


This sample has a much lighter and feminine feel to it, compared with the sample I completed on felt. I felt that I had made progress with some of the stitching techniques, e.g. the moss stitch and feather stitch, but still have quite alot to learn about cable stitch! I think that I need to perfect exactly which tension to tighten to for the top thread for this to start looking neater. I did make the decision to stitch around the outside of the flower shapes, but do wonder what the design would have looked like had I left this, like the sample in the course materials. I like the way the lighter areas of fabric show through the stitching inside the petals though, and also liked the effect of picking up some of the colours in the background fabric, but leaving other areas showing though where I used granite stitch.

(Total time spent = 8 hours)