Vermicelli Stitch
Experiments on different fabrics...
Sample 1

This was my first sample, backed with green felt. I sewed quite large curves and used a variegated thread in different shades of green (Wonderfil 'Fruitti' 02 wt 12).
Sample 2
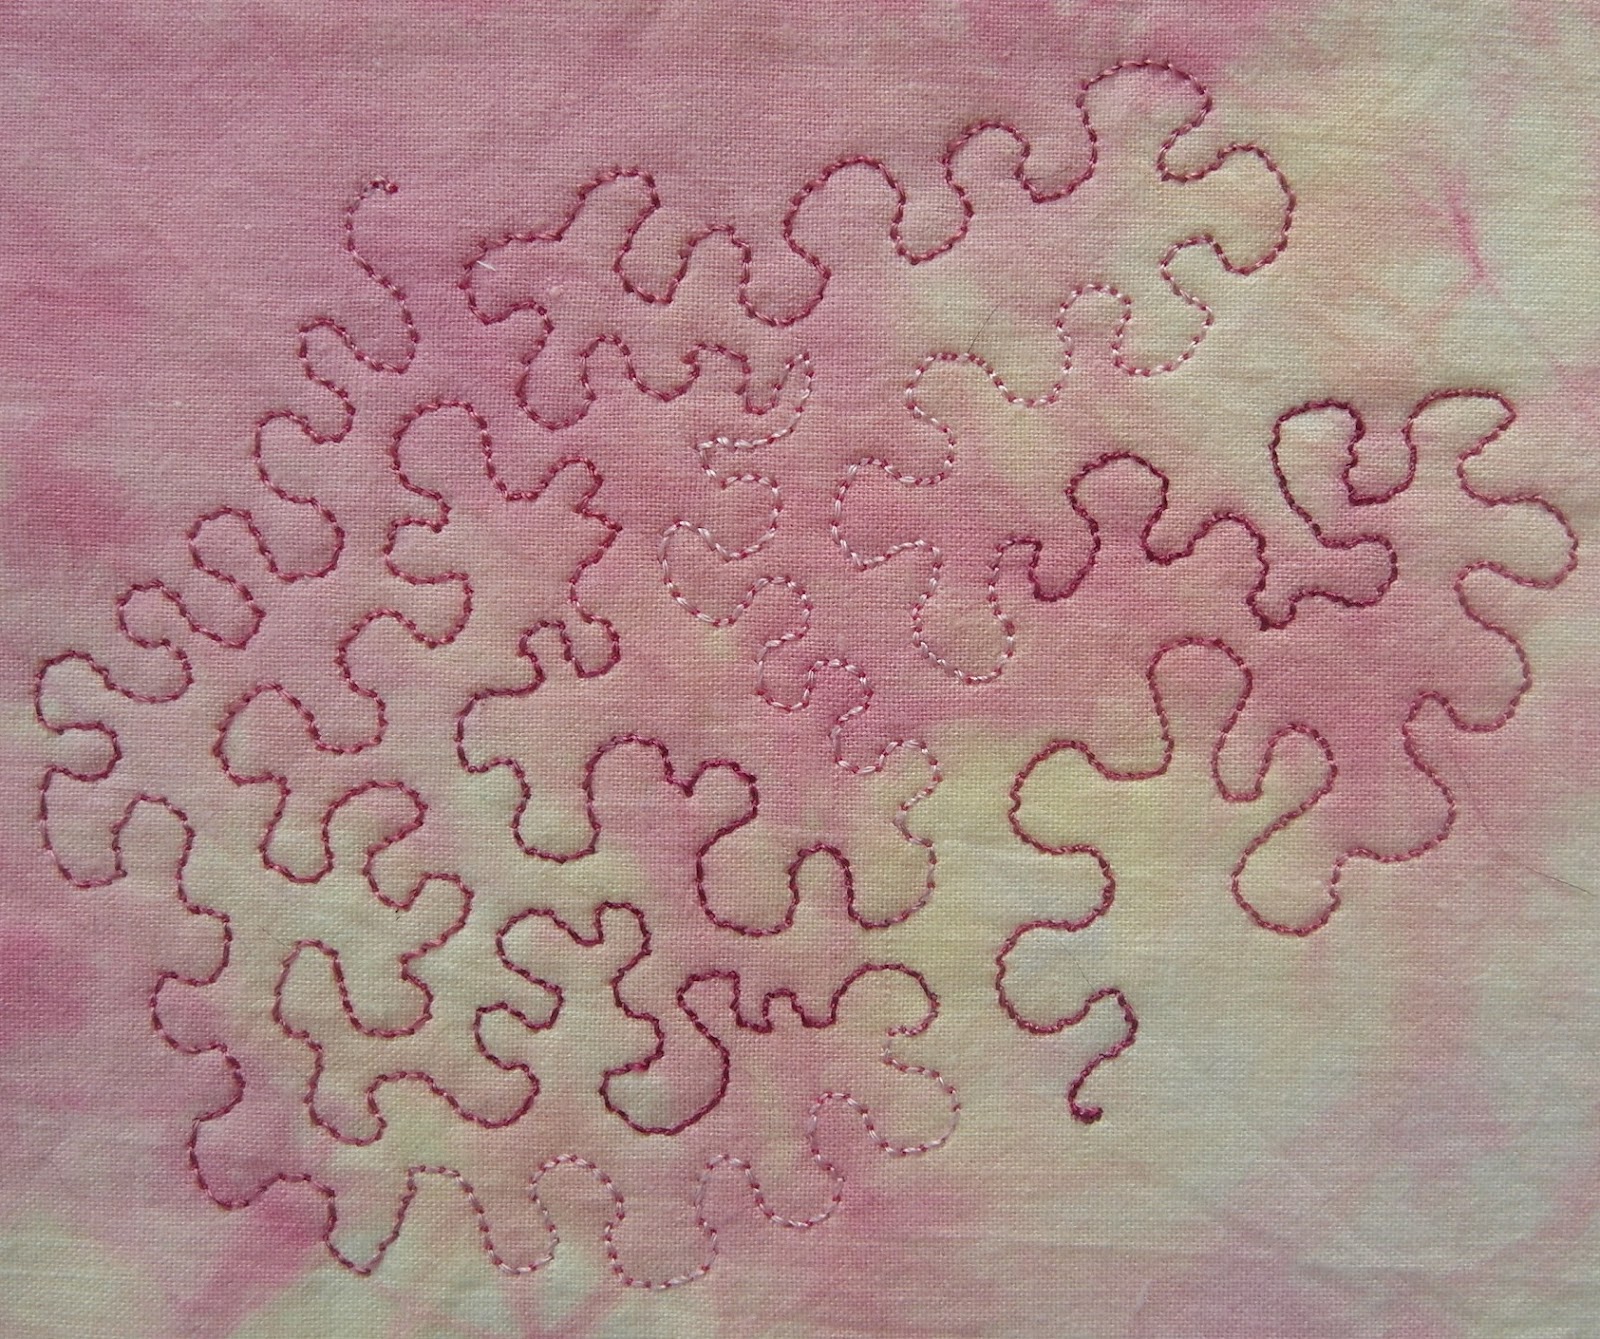
This was backed with calico that I had dyed with dilute red and yellow procian dyes (crumpled up in a plastic beer glass!). This times I used a variegated pink top thread (Wonderfil ACM 35 wt 12) and a cerise thread in the bobbin, and sewed in tighter curves. I felt a little more confident this time and enjoyed sewing in a continuous 'wiggle'!
Sample 3
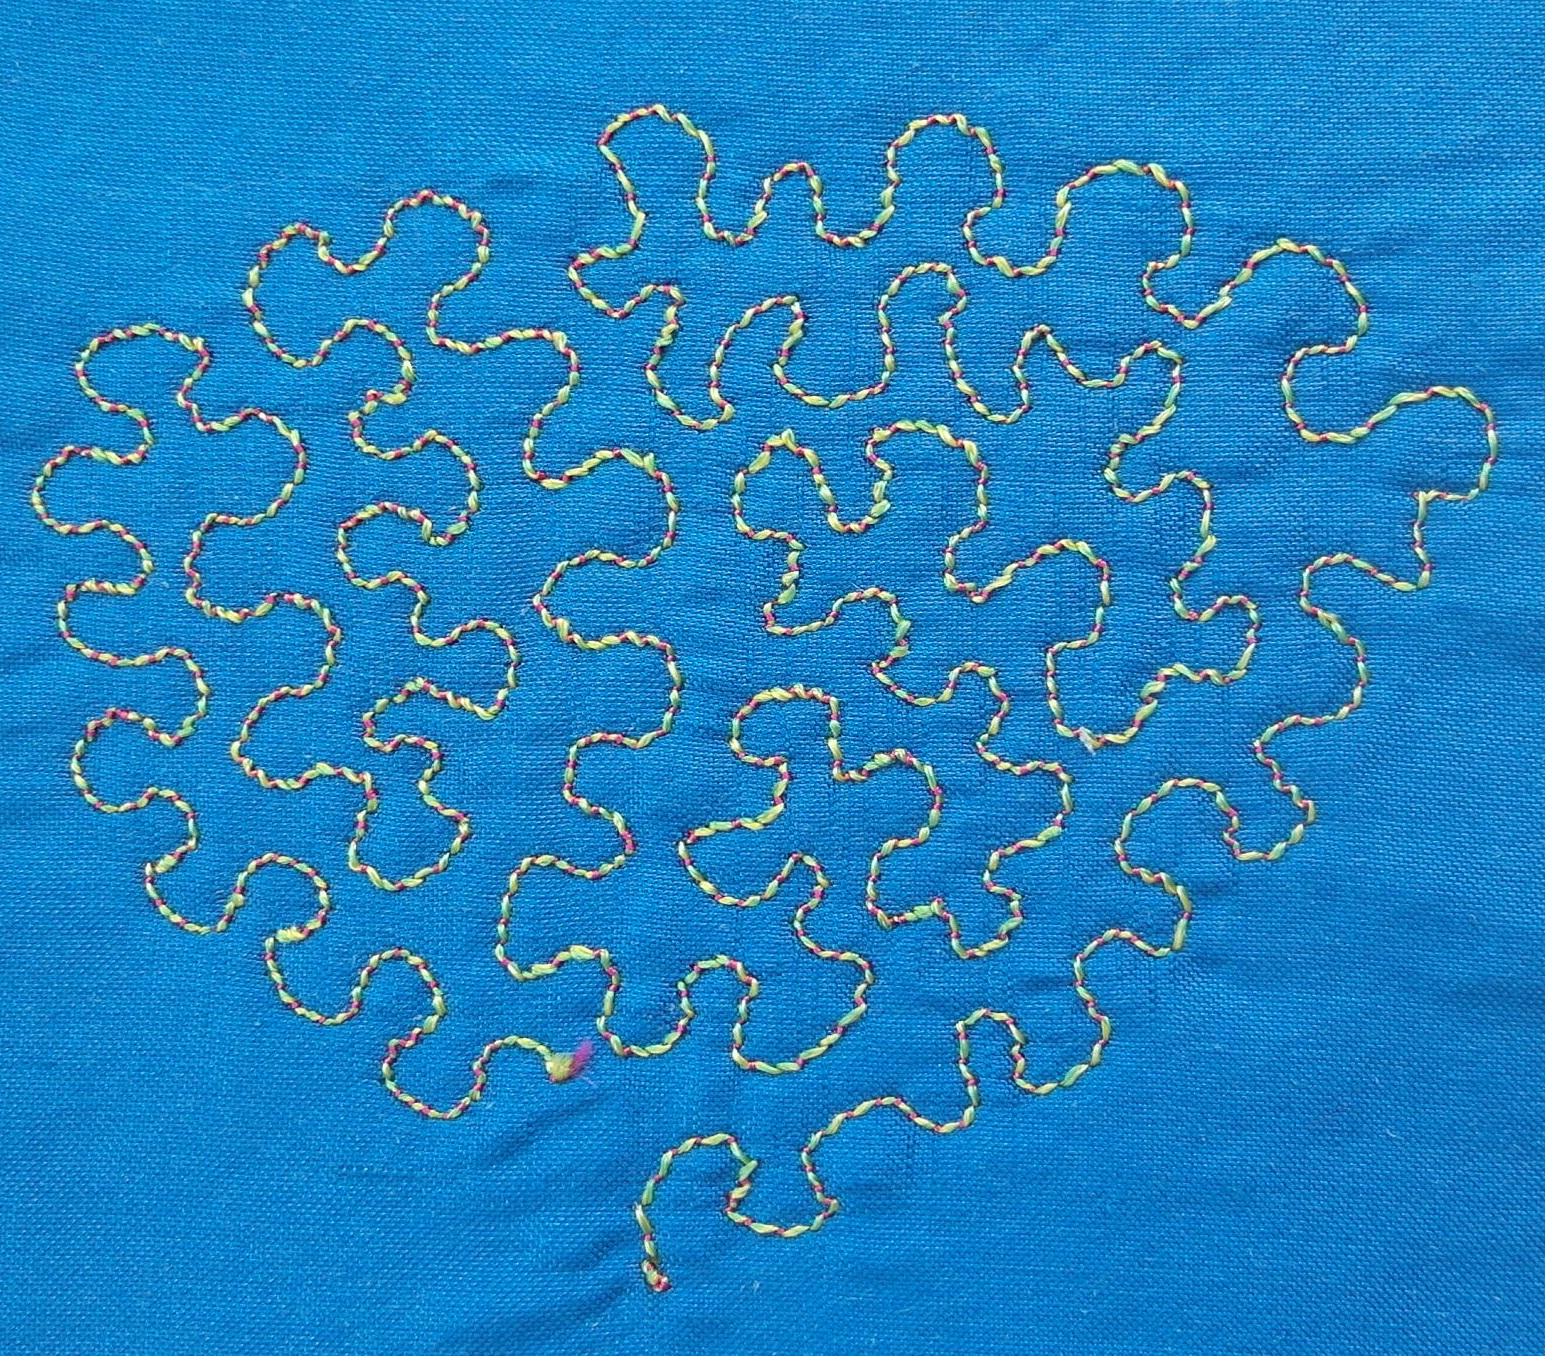
This sample is sewn on blue silk, and I used the same variegated green thread that I used for sample 1. I kept the cerise thread in the bobbin, and this can be seen from the front, creating a stippled effect. I used quite small curves this time and felt much more confident that I wouldn't cross over the line or run out of room.
Vermicelli using Zig-zag stitch
Sample 4

This sample is sewn on silk velvet that has been dyed with blue and red procian dyes that have mixed in places to create a rich purple. This time, I altered the width of the stitch to 2.4, and was surprised that this didn't make the stitching much more difficult to complete. I liked the way that the stitches 'sunk' into the pile of the velvet & it would be interesting to try this using smaller curves for the vermicelli stitch.
Sample 5

This sample has been sewn on a maroon-red felt, using a variegated pink thread (Wonderfil ACM 35 wt 12). I altered the stitch width from 2.4 to 5.0, starting at the thinner stitch width. I like the effect that using a variegated thread creates in the curves of the vermicelli, when using the wider stitching.
Sample 6

This sample is sewn onto blue silk, using the same stitch widths as those used for sample 5, but with the light green thread on top and a dark pink in the bobbin. This needs a stiffer backing, as the denser stitching has pulled the fabric in in places.
Sample 7

This sample is sewn on a loosely woven fabric (it was an offcut, so I'm not quite sure exactly what it is), using a stitch width of 2.4. The fabric was easy enough to sew on, but would need a darker thread combination to show up more, as there is not enough contrast between the colour of the stitching and the background.
Granite Stitch
Sample 8

I used green felt for the background, the light green thread on top and a dark pink thread in the bobbin. I managed to sew in quite small circles and liked the stippled effect created by the pink thread being pulled up the the surface of the fabric.
Sample 9

I used the same thread combination as sample 8 on the woven fabric, to compare the effect. I think that granite stitch looks better on this fabric than the vermicelli, as more coverage is obtained.
Sample 10

This sample was sewn on the same silk velvet that I used for vermicelli stitch. I really like the effect achieved by the stitches sinking into the velvet, leaving little tufts of fabric to stick out. The final effect is quite 'dreamy' and reminded me of a cloud in a summer sky.
Sample 11

This time I used a metallic thread in a dark turquoise onto a tweed fabric. I don't really like the colour combination, but it was interesting to see how the granite stitch seemed to change the darker pattern in the tweed.
Whip Stitch
Sample 12

I used a Wonderfil 'Tutti' thread for the top thread and a dark pink thread in the bobbin. I changed the tension from 3 to 10 (from left to right), which pulled more and more of the bobbin thread through. I also found that I had to move the fabric more slowly as I increased the tension, to stop the thread from breaking.
Feather Stitch
Sample 13
.JPG)
When I started to sew feather stitch, I found it a little bit difficult to make it look any different to the whip stich in the previous sample. It wasn't until I got to the last two tries on this calico that I began to get the hang of it, and moved the fabric more extremely, with a wider stitch, to achieve the feathered effect. I think that I need to try again and also run the machine more quickly...
Sample 14

I went back to feather stitch again at the end of the chapter and had another try. I ran the machine much more quickly and experimented with moving the fabric more 'violently'. I did achieve a more feathered effect this time, and the tension was right for the fabric (felt). It still doesn't look like the sample in the course materials though...
Moss Stitch
Sample 15

This was my first experiment, and I used a metallic variegated thread on calico. I tried out different stitch widths, which created bigger loops as the width was wider and also tried moving the fabric slowly and quickly. This was completed out of a frame, and the fabric ruckled quite alot, even with a stiff backing. I liked the effect of the larger loops though. I used a monofil thread and removed this once an iron on stiffener had beed placed on the back.
Sample 16

As I wasn't pleased with the calico sample, I tried moss stitch again at the end of the chapter, this time on felt and in a frame. I used a variegated thread (Wonderfil wt. 30) in lilac, blue, pink and brown for the loops in the bobbin and a monofil thread on top. I was much more pleased with this version and could see the progression in my technique from the earlier samples. Using a frame was much better for the fabric (even though I find them annoying!).
Using the Stitches
Sample 17

I chose one of my images of leaves from Chapter 1 and used cotton velvet that had been dyed with dilute green and blue procian dyes. I sewed around the outilne of the leaves using moss stitch and a variegated metallic thread (Madeira Supertwist No. 290). I then sewed around this using a mixture of whip stitch in dark pink and straight stitch in dark green thread, with a dark pink in the bobbin. I wasn't quite happy with the open space of the leaves and also felt that the straight stitching was a little too regular and 'neat'.
Adding some extra stitching...

I decided to fill in the empty spaces of the leaves, using a variegated yellow, orange and cream thread. I felt that this improved the design, but still didn't like the straight stitching around this.
Aquilegia - Sample 18

I managed to buy some space dyed felt for this sample (from 21st Century Yarns), which I loved, and decided to try another sample. This time I chose some images of aquilegia, which I dotted around the felt in different positions. I did find it quite difficult to draw on the felt though! I sewed around the outline of the flower with a variegated thread (Wonderfil SD 12, wt 30 in lilac, dark pink and brown) & then just inside this outline with a lilac thread, using whip stitch (top tension set at 6). Then I sewed in the stamens in a variegated yellow & orange thread, which I felt 'lifted' the design. For the straight stitching around the outlines, I used a red and pink thread on top and a yellow thread in the bobbin. I tried really hard not to be too 'neat', and was much happier with the final result. I like the subtle effect of the outines not being too obvious, which draws you to look more closely at the design, and I feel that the straight stitching is more 'artistic' in this version.