Chapter 9 - Stitch and Manipulate!
Stitching on Paper
Sample 1
This is a piece of rectangular blue/green khadi paper, that is speckled in silver paint. I used a flower printing block and printed in dark blue on one side of the paper and silver on the reverse.
Stitching on Paper
Sample 1
This is a piece of rectangular blue/green khadi paper, that is speckled in silver paint. I used a flower printing block and printed in dark blue on one side of the paper and silver on the reverse.

I stitched in vertical columns of orange/variegated orange and yellow thread in a flower patterned automatic stitch and a variegated pink spiral stitch.

After this, I made a 'reverse' lantern shape, with the edges curled out, to show the reverse side of the paper .

Photo from above, to show the reverse

Sample 2
For this sample I used a thick peach coloured paper and printed with the same block as sample 1, but in a metallic purple paint on both sides. I then stitched with automatic patterns in a light green and red/purple in diagonal lines across the paper.

This enabled me to curl and manipulate the paper at an angle towards the centre, and then glued the curls together.

The close ups show the red/purple stitching to good effect - where I used the red on top and purple in the bobbin. I liked the shapes and shadows made when photographing close up for this sample.

Sample 3
For this sample, I used a circular piece of red khadi paper and printed it with a flower shaped foam block - first in a dark blue and then a shadow print in gold. After this I stitched out from the centre in yellow, using a curly, spiral automatic pattern.

After stitching, I cut out from the centre in curved lines and manipulated the paper into a 'bowl' shape, but leaving the edges sticking out. I used a small stitch on each section to hold the paper in place (below).

I liked the shape that manipulating the paper in this way made and thought that the colour combinations looked a little Japanese.

Photo of the bottom of the 'bowl'

Sample 4
Layers of paper
I used three layers of paper - a pink paper with a gold flower print on top, a pale pink paper in the middle and a green/yellow khadi paper on the bottom, which was speckled with silver. I printed on the pink side of the paper with a gold flower print block and on the green side in silver. I stitched in rows from top to bottom in purple, dark green and golden yellow, using different automatic patterns.


I then ripped the paper carefully into strips and made a chain of mobeus loops. I like the effect of the contrasting colours as the paper loops twist over and how this shows the stitching on each side. However, the middle, pale pink layer of paper can't really be seen - this was probably because this paper was thinner than the outer sheets and became 'lost' between them!

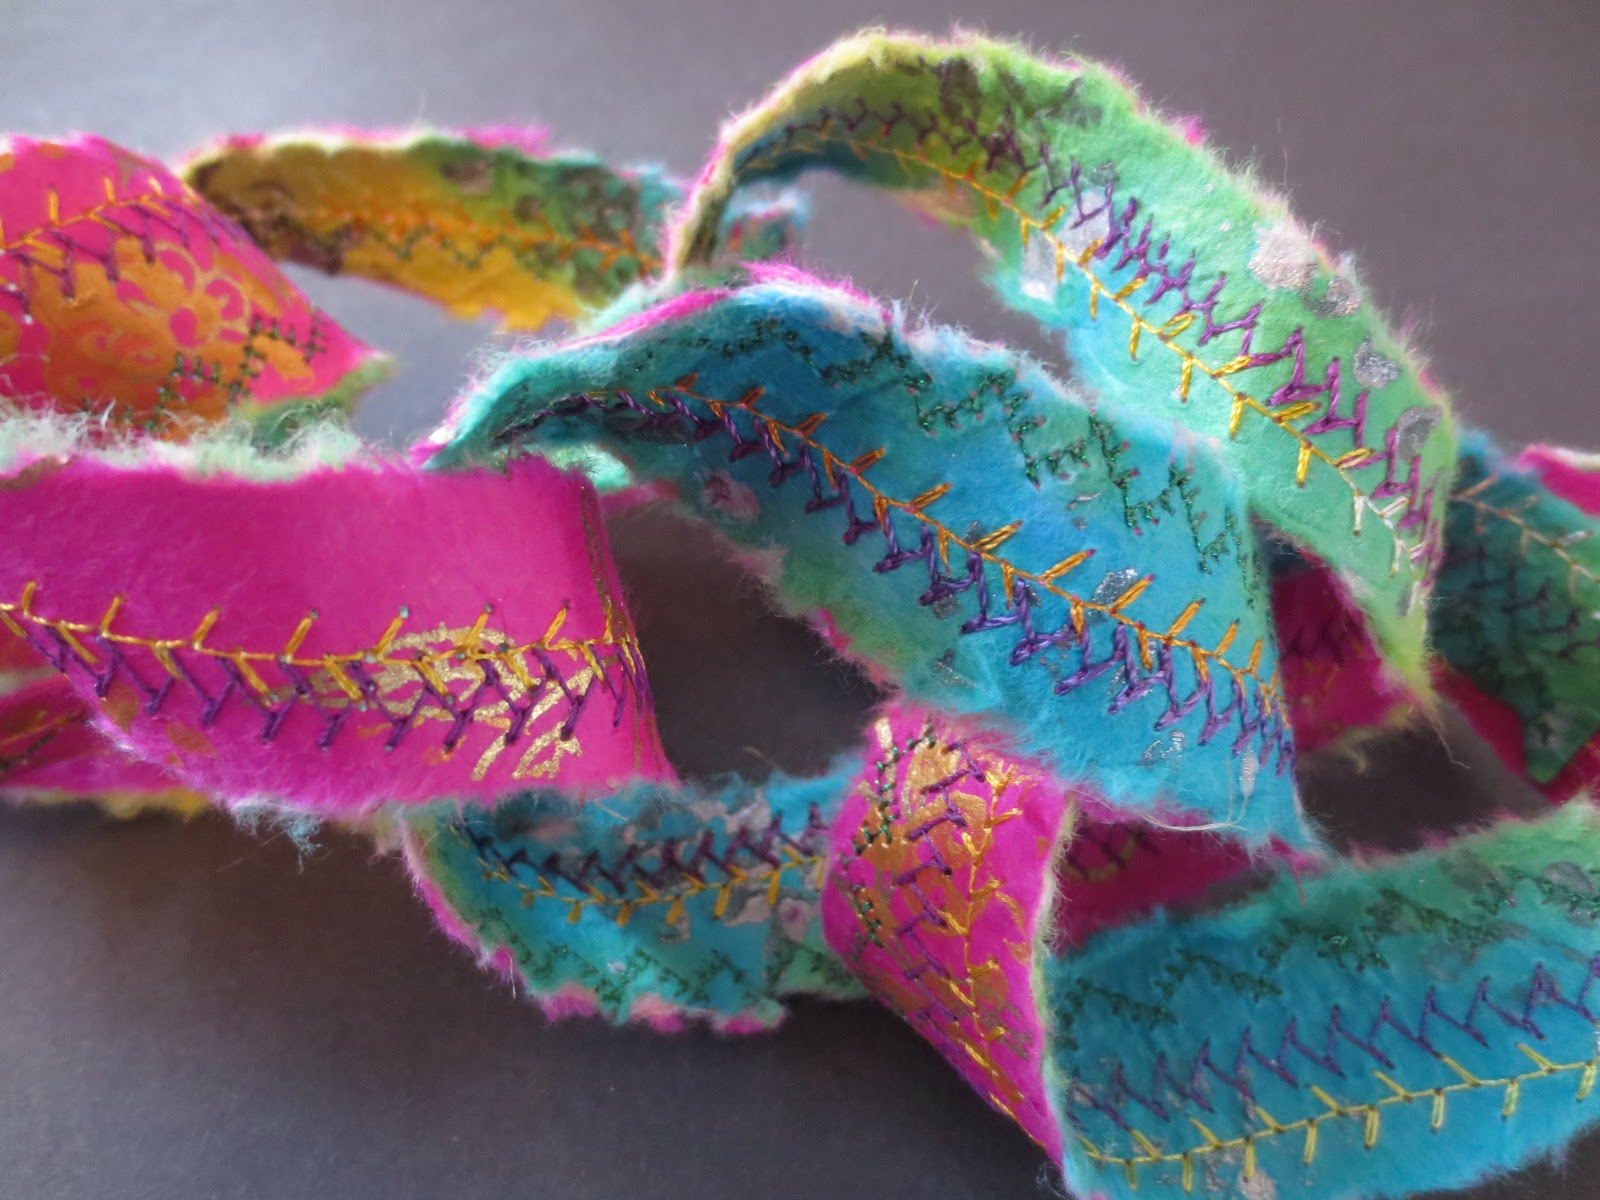
Close ups of the curls (above and below)

Sample 5
Stitching on thinner paper
I found some serviettes with flower images on (for decoupage) and thought that the image below of peonies would be suitable for embellishment. I made a sandwich with one layer of this on the top, fusible backing, calico, more fusible backing and a serviette layer of green tissue on the bottom, following the instructions in the course materials.

I stitched the outlines of the flowers and some of the leaves in colours that blended in with the original image - I used green for the leaves and stems and a variegated pink thread for the flower heads and petals. For the stamens, I outlined the shape using a gold metallic embroidery thread. Once the outlines were complete, I used the variegated pink thread to 'shade' the petals along with a darker red, mauve and pink variegated thread (both Wonderfil threads). I then used greens of differing shades inside the leaves and along the stems in a similar way.
Close up of stitching (below)


I thought the reverse side of my sample was less effective than the top as the pale pink doesn't really stand out from the light green of the background. I also wished that I hadn't outlined the flowers and leaves either, as a more impressionistic effect might have been achieved by only highlighting and stitching some of the inner parts of the flowers.

Sample 6
Stitching on waxed paper
For this sample, I painted khadi paper in green paint and made streaks across it in orange. I then printed on each side in bronze paint using a 'seed pod' style block. Once this had dried I cut the paper into a circle and stitched from the centre to the outer edge using curly and spiral design automatic patterns in red and blue.

I then cut curved lines from the centre, out towards the edges and manipulated the flaps I created in to small bowl shape. The sides of the structure were then stitched together to hold them in place.

I really like the translucent effect that painting the paper in acrylic wax gives to the bowl - when held up to the light, it looks like a completely material altogether. Also where I stitched, the needle punched out small holes of the paper when the machine was sewing in circles - although this wasn't intended I liked the quirky character this gave the bowl.

Sample 7
Stitching on waxed paper
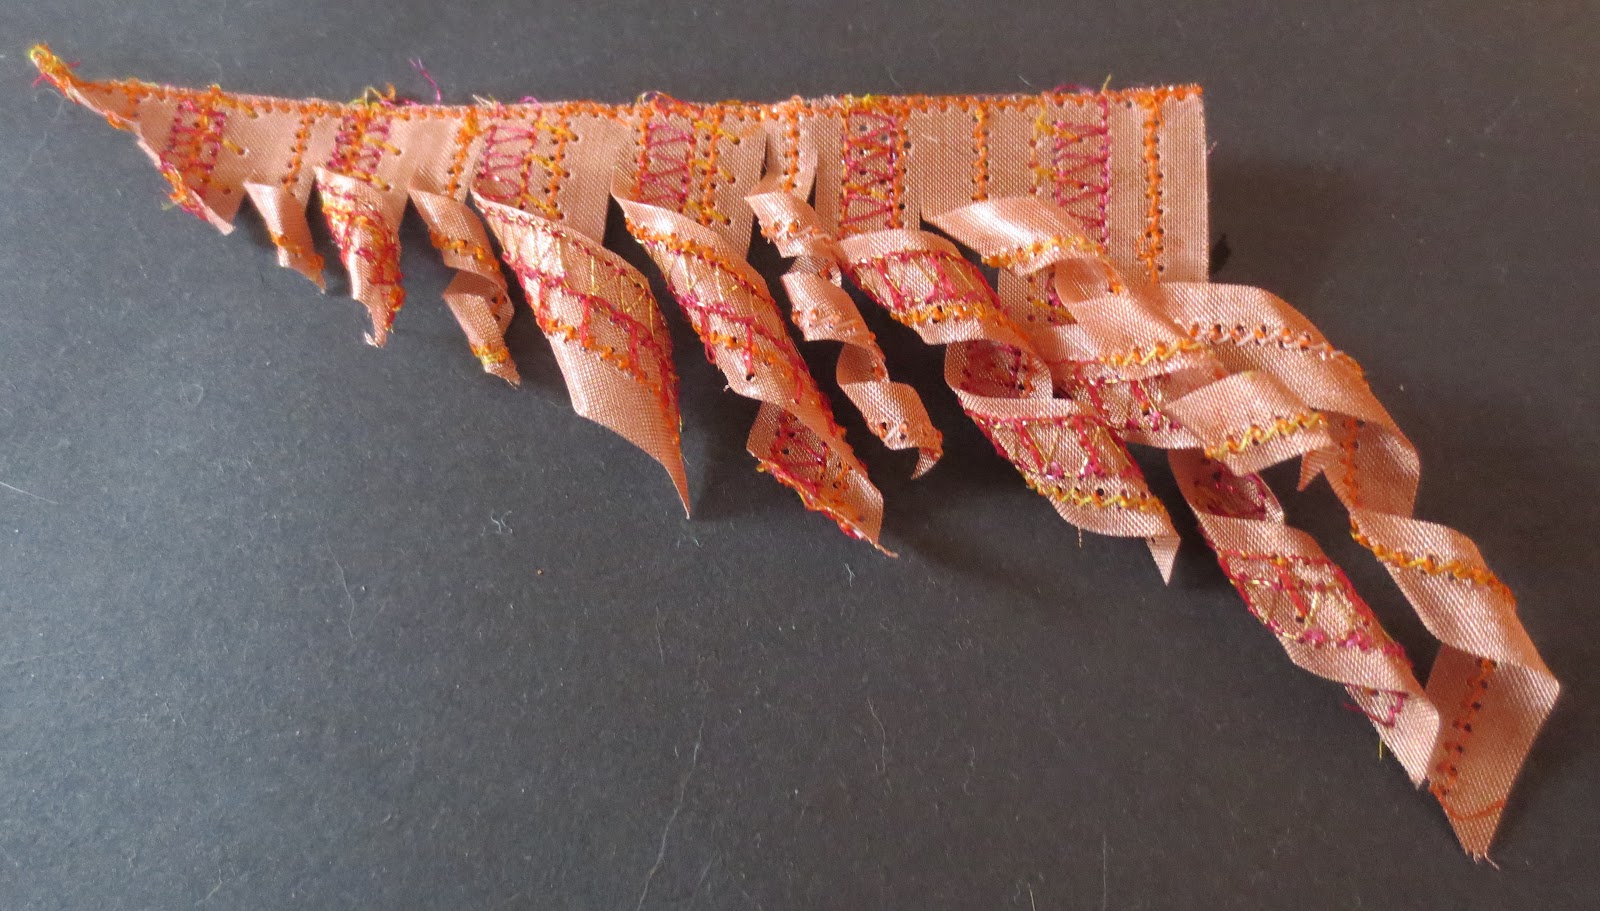
For this sample, I painted some khadi paper in orange and sponged on red patches on both sides. I then printed on the top and bottom sides in metallic green with the flower block I had used in earlier samples and chapters. I went across the paper diagonally and then followed this pattern with stitching.
For this sample, I painted some khadi paper in orange and sponged on red patches on both sides. I then printed on the top and bottom sides in metallic green with the flower block I had used in earlier samples and chapters. I went across the paper diagonally and then followed this pattern with stitching.

Once I had finished stitching, I cut diagonally across the paper in strips in a variety widths and then curled the paper in different directions. I found that because the paper had a coat of wax, that it held the curls more easily than paper that was untreated. It behaved a little more like fabric, rather than paper. This could be useful to remember for future pieces where manipulation of paper is required.

Close up of some of the curls.
I also like the way that coating the paper in wax lets the ink from the opposite side of the paper show through on the top.

Close up of the curls from the end (below)

Stitching on Wire Mesh
Sample 8
Having experimented on various types of paper, I then tried stitching and manipulating copper mesh. I cut the mesh into triangles and for my first attempt, stitched on unheated copper using automatic patterns in red gold and variegated orange/yelow thread. I cut into the triangle, following the lines if stitching and then curled the mesh into spirals, all facing in the same direction.
Close up of stitching/curls (below)

Sample 9
For this sample, I used the second triangle of mesh that I had cut. This time I heated the copper over a flame on a cooker hob, which made the metal change colour. Then I used spiral and curly automatic stitch patterns in red, gold and orange to decorate the metal.
For this sample, I used the second triangle of mesh that I had cut. This time I heated the copper over a flame on a cooker hob, which made the metal change colour. Then I used spiral and curly automatic stitch patterns in red, gold and orange to decorate the metal.

I cut and curled strips of mesh up towards the horizontal edge around a thin pencil. I preferred the colours of the copper that had been heat treated - they give the finished sample an 'aged' look, whereas the unheated copper looks quite brash.
The mesh is easy to manipulate and holds its shape afterwards. It is also easy to stitch on, even with delicate metallic threads.
Close up (below)

Sample 10
For this sample, I cut a parallelogram shaped piece of copper mesh and made a sandwich with snippets of coloured chiffon, covered on one side with green chiffon and with a lilac chiffon on the reverse. I used a variety of automatic stitch patterns to decorate the sandwich, in red, purple, a thicker lilac/pink thread and variegated yellow/orange threads.
(See below)
Green side

Lilac side

I also stitched a line across one diagonal of the parallelogram before cutting diagonal strips into the copper along the stitch lines. I didn't heat the copper for this sample, as it was covered with fabric and thought that any effect that heating made to the copper wouldn't be seen.
Once I had made the cuts, I curled the strips around a thin pencil to create 'ringlets', facing in different directions. I also curled the mesh around the centre line of stitching in order to show the differently coloured sides of the sample. When I did this, I discovered that there were an infinite number of possibilities for shaping the sample and that it was a little like a 'bendy' toy!
The strength of the copper had this advantage over the paper used in the previous samples in this chapter.
Finished Sample


Close up
