Sample 1- stitching on ticking

Front side of strip (above)

Reverse side of strip (above)

Front side of finished sample (above)

Front side of finished sample with folded side of prairie point showing (above)

For sample 1, I used cotton ticking for the background fabric (50 cm long & 8cm wide), as I thought that the stripes would look interesting under the stitching. I used a variety of thread colours and automatic stitches to decorate the fabric as follows:
Stitch No. 72 in dark pink (1110)
Stitch No. 65 in golden yellow (1024) and variegated thread (Col. 2053)
Stitch No. 30 in lilac (1080)
Stitch No. 31 in dark pink (1110)
Zig zag stitch (length 2 & width 2) in dark pink (1110)
I made the edging strip using similar stitches and colours, but decided against the variegated thread, as the effect was lost amongst the dense stitching. When sewing the prairie points on to the edging strip, I used an alternating pattern (with either the front or back side of the point facing the front). I liked the overall design, once this was finished, especially the effect achieved by the 'honeycomb' stitch when the edges were folded over to form vertical stripes. I would probably use a darker or brighter thread in place of the yellow next time, as it looks a bit 'lost' against the stronger colours. Maybe a contrasting colour (like a light green) would lift the design to make it slightly more dynamic?
Total time spent = 4 hours
Sample 2 - Prairie points on silk
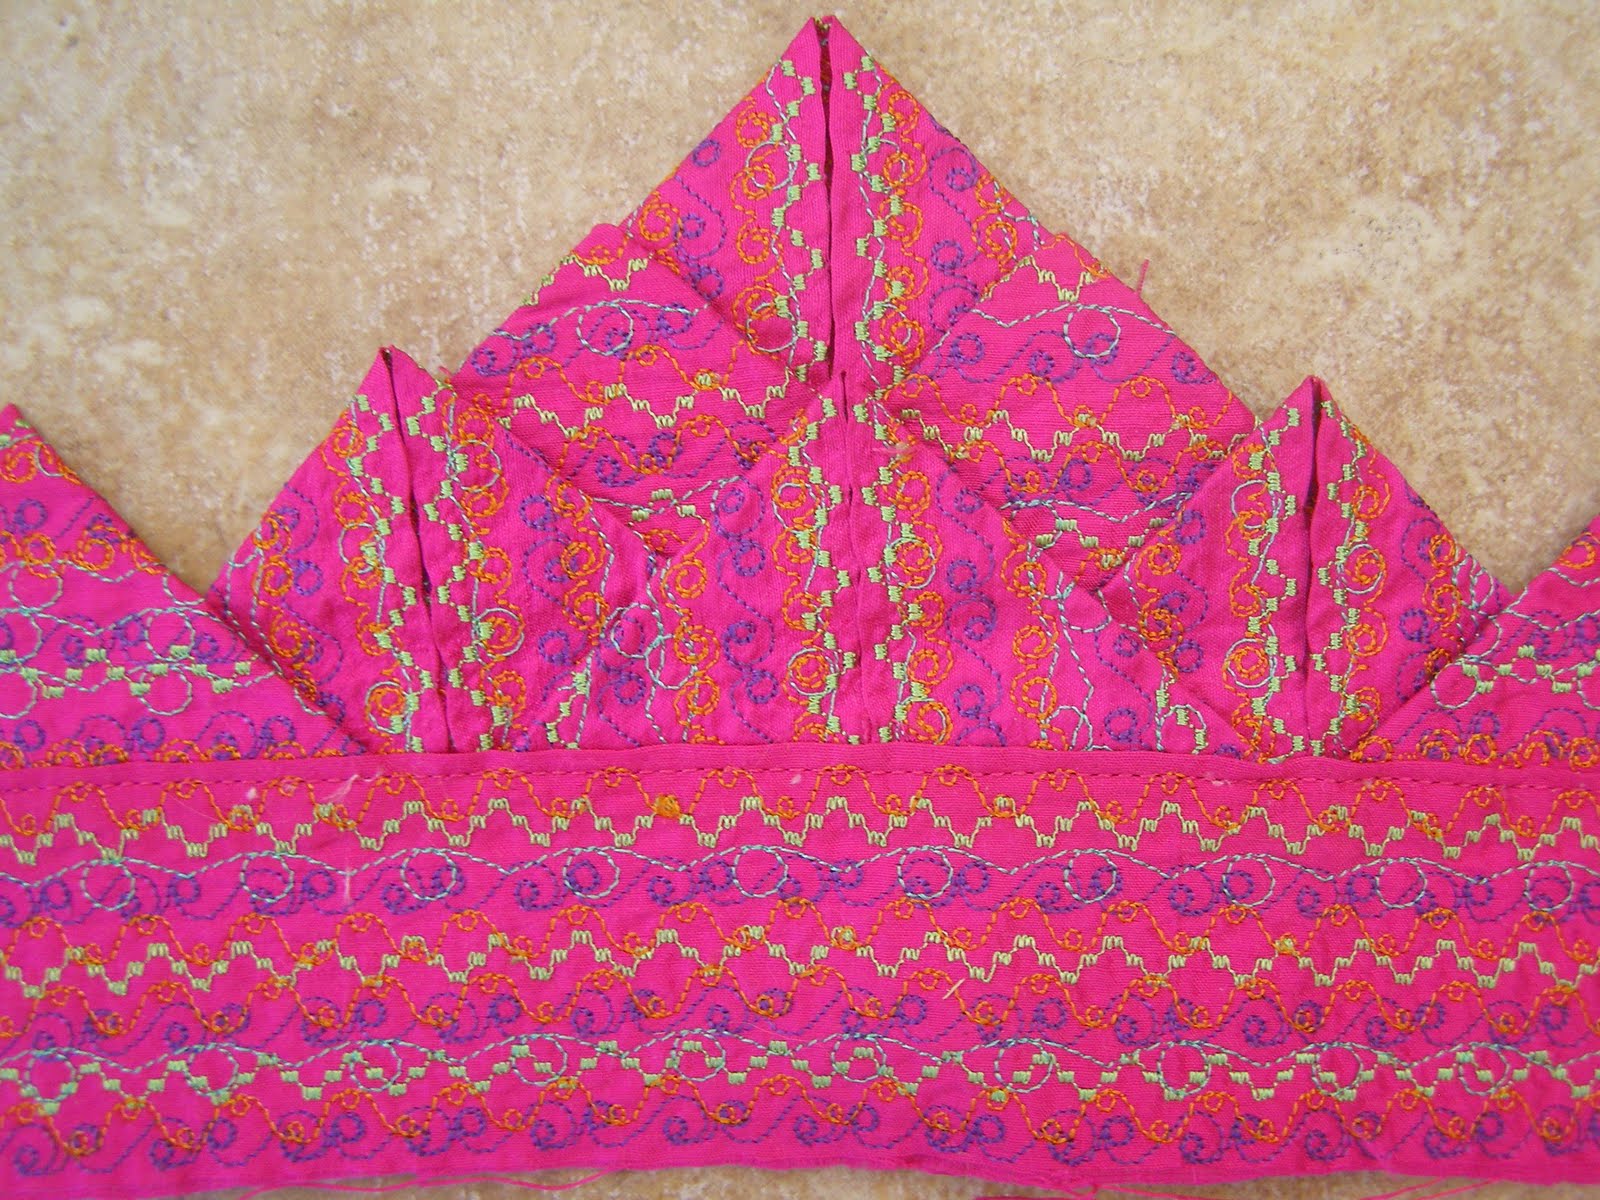
Front side of finished sample (above)

Close up of finished sample (above)

Finished sample (above)

Close up of prairie point and stitching
Materials used for sample 2
Shocking pink dupion silk
Stitch No. 146 in purple (1122)
Stitch No. 162 in lime green (1248)
Stitch No. 169 in mint green (1301)
Stitch No. 172 in orange (1278)
I decided to use a much more luxurious material for my second sample, with a much brighter colour, and chose a very bright pink dupion silk. This time I chose threads that were much richer colours than sample 1, with more contrast. I was very pleased with the final result this time, and it reminded me of brightly coloured saris. The deep purple that I used adds depth to the overall design and the light green provides the contrast to the background fabric that was missing in my first sample.
Total time spent = 3 1/2 hours
Sample 3 on paper

Finished sample (above)

Close up of front side of prairie point (above)

Close up of reverse side of prairie point (above)
Materials used
Yellow craft paper
Stitch No. 177 in variegated thread (Col. 2053)
Stitch No. 172 in light green (1301)
Stitch No. 177 in light blue (1075)
I decided to try sewing on paper as an experiment, with very interesting results... The more I stitched the paper, the more flexible it became and started to behave like a soft fabric. It eventually became quite floppy and unrecognisable from its original form. Paper was quite easy to sew on and the end result was very bright and jolly. It would have been difficult to sew any more stitching on this sample, as I think the paper would have started to disintegrate.
Sample 4 - Prairie points on plastic netting

Finished sample (above)

Front side of prairie point (above)

Reverse side of prairie point (above)
Materials used
white plastic netting, with sparkly flecks
Stitch No. 167 in red (1147)
Zig zag stitching (width 2.9, length 2) in orange (1278)
Stitch No. 166 in yellow (1024)
Stitch No. 167 in yellow (1024)
This was another experimental sample with a completely different type of background material. The plastic netting was flexible, but quite springy, so I needed to sew a row of stitching quite close to the fold in order to control it. I stuck to a range of bright, warm colours and didn't sew too heavily, as I wanted the neting background to show through. I liked the effect of sewing on a slightly more transparent material, especially as some of the stitching on the reverse side could be seen from the front of the sample.
No comments:
Post a Comment